
I have been running Elasticsearch on Windows for almost two years now. As a .NET developer and general happy Windows user, choosing a known environment have some advantages. In fact Elasticsearch runs pretty smooth on Windows, but it’s no secret, that the support for running Elasticsearch on Linux has always been better. Most of the documentation and blog posts around the web use Linux examples and most of the third-party products that Elasticsearch are recommending also run on Linux.
As a .NET developer, you’re typically not running Linux and most of the .NET folks I know, do everything to avoid getting to know anything about Linux. One option is to run Elasticsearch on Linux on your production environment and still host it on Windows on your developer machine. The ideal solution is of course to use the same OS both localhost and in production. Vagrant to the rescue!
![]() Vagrant is an open source software product for configuring virtual machines. Below the hood, Vagrant is pretty much a wrapper for other virtualization products like VirtualBox and VMWare with some nice configuration options on top. Getting up and running with a new virtual machine, typically require you to download a preinstalled image, but it is fully supported to install your own images (both Linux and Windows). In this post I will show you how to get up and running hosting Elasticsearch on Ubuntu on your Windows machine.
Vagrant is an open source software product for configuring virtual machines. Below the hood, Vagrant is pretty much a wrapper for other virtualization products like VirtualBox and VMWare with some nice configuration options on top. Getting up and running with a new virtual machine, typically require you to download a preinstalled image, but it is fully supported to install your own images (both Linux and Windows). In this post I will show you how to get up and running hosting Elasticsearch on Ubuntu on your Windows machine.
Start by installing Oracle VirtualBox 4.3.6 and Vagrant 1.4.3. Feel free to use newer versions of both products, but Vagrant and VirtualBox got a long history of incompatibility. New virtual machines are created from a Vagrant configuration file (simply named VagrantFile):
The important part of the configuration is prefixed with config.vm.*. I’m using a preinstalled Ubuntu image named precise32. Vagrant comes with support for both Puppet and Chef, but as I don’t have much knowledge about these products, I’ll stick to running simple bash scripts. In line 7 I tell Vagrant to execute a script named bootstrap.sh, when creating the VM. In line 8 I configure Vagrant to forward requests to port 9200 on my local machine, to port 9200 on the new VM. This way requesting http://localhost:9200/, forwards the request to port 9200 on the Linux VM.
My bootstrap.sh is pretty simple too:
The script should be self-documenting, but the idea here is to install Java and Elasticsearch. In the last line I install head, which is a great management plugin for Elasticsearch. This is of course optional.
To create the new VM, navigate to the folder containing your VagrantFile and execute:
vagrant up
This produces a fair amount of log statements. With only the important lines extracted, the log looks something like this:
The Ubuntu image is fetched from the web and Java, Elasticsearch and head are installed. Now the new VM is created and running. To proof everything is working, visit head in the browser:
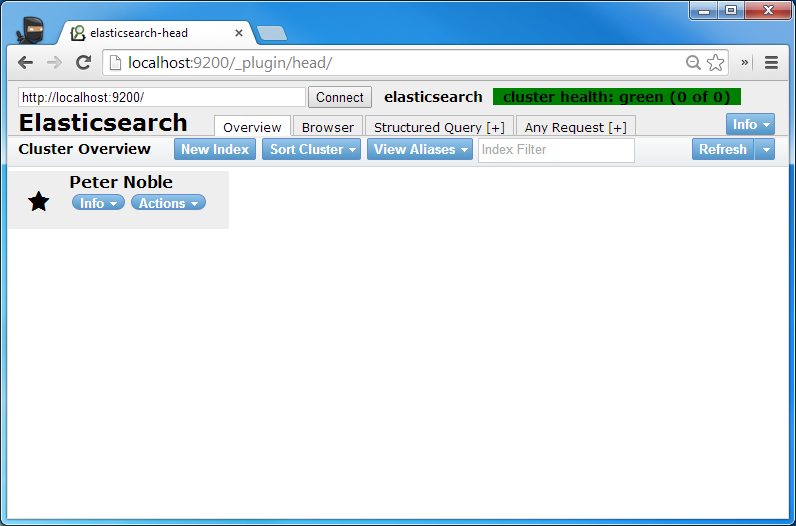
Voila! Your very own Elasticsearch hosted on Linux.
This post were produced by a mix of my own knowledge, a nice and much more complex bash script that my talented co-worker Jesper produced for the project we are working on at eBay, as well as a great post on installing Elasticsearch on Linux by Mookid.