A couple of weeks ago, I decided to switch from CoffeeScript to TypeScript on the project I’m working on at eBay. In my opinion, TypeScript makes a lot of a lot more sense when working with web applications in .NET. These are some of the advantages I’ve identified so far:
- Great tool support. The Visual Studio add-in for TypeScript offers IntelliSense, which I never really found a good solution for with CoffeeScript.
- Strongly typed: TypeScript lets you strongly typed parameters and field.
- Modules and classes. Like CoffeeScript, TypeScript makes it a lot easier to define namespaces and classes. I really like the TypeScript syntax better than CoffeeScript.
In order for you to try out the examples in this blog post, you need to install TypeScript, Web Essentials and Chutzpah (install through Visual Studio Extensions and Updates).
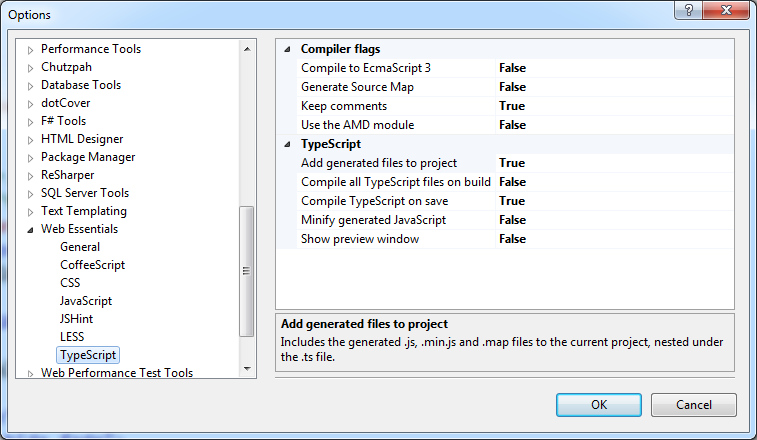
Porting the existing CoffeeScript files is easy. Grab the existing JavaScript, generated by your CoffeeScript compiler. Paste the content into a new TypeScript file and worry about using the nice features of TypeScript later. I use Web Essentials to edit my TypeScript files and went through all the options for this to work out. Here is a screenshot of my settings:

I changed the Keep comments to True, in order for my unit tests to work – more about this later. Also Compile TypeScript on save is enabled, because TypeScript as default only compiles the JavaScript on build.
Here’s a simple example of a TypeScript file called generator.ts:
module ThomasArdal {
    export class StringGenerator {
        generate(input: string) {
            return input + ": Hello World";
        }
    }
}
This is probably not the most advanced script you have ever seen (I hope), but it illustrates the main features in TypeScript: modules, classes, and strongly typed parameters. The generator method is called by running the following piece of TypeScript:
var gen = new ThomasArdal.StringGenerator();
console.log(gen.generate("Hi"));
Now for the purpose of this blog post: the unit test. We are using the excellent JavaScript unit test runner Chutzpah to execute our tests both from within Visual Studio and our TeamCity build server. The unit tests are written using QUnit, but if you prefer Jasmine, Chutzpah supports that as well. To install QUnit in your test project, run the following NuGet command:
Install-Package QUnit-MVC
The qunit.js script is added to your test project in a Scripts root folder. You can change the location of the QUnit script, but if you do, be prepared for some manual work each time you update QUnit to a new version.
Add a new TypeScript file named generator.tests.ts.
///<reference path="qunit-1.10.d.ts"/>
///<reference path="generator.ts"/>

QUnit.module("generator.ts tests");

test("Can generate string", function () {
    // Arrange
    var gen = new ThomasArdal.StringGenerator();

    // Act
    var result = gen.generate("Hi");

    // Assert
    equal(result, "Hi: Hello World", "Result should be concat of input and Hello World");
});
Besides a reference to the script we are about to test (generator.ts), I reference a file named qunit-1.10.d.ts. Normally you would reference qunit.js, but in order to get IntelliSense in TypeScript, you need to reference a definition file (d.ts). Luckily Boris Yankov did a great job extracting definition files from various JavaScript frameworks in this GitHub project. Another thing to notice here, is the module-function call. Under normal circumstances, you simply call this function directly, but because “module” is a keyword in TypeScript, you need to use the QUnit object instead. Writing the QUnit test is straight forward with an arrange, act and assert.
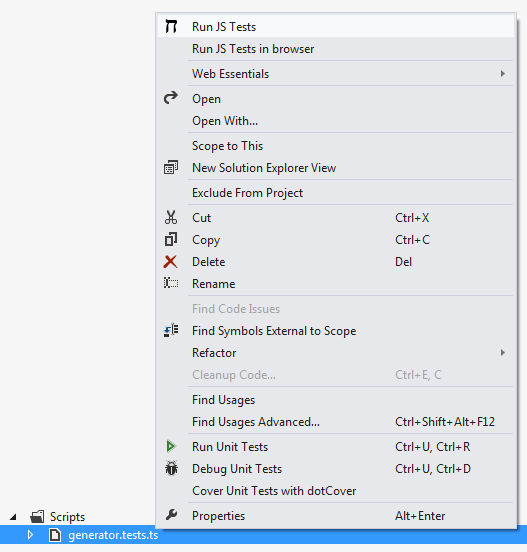
That’s it! Testing TypeScript with TypeScript is easy. Right click your test file and run your test using Chutzpah:

